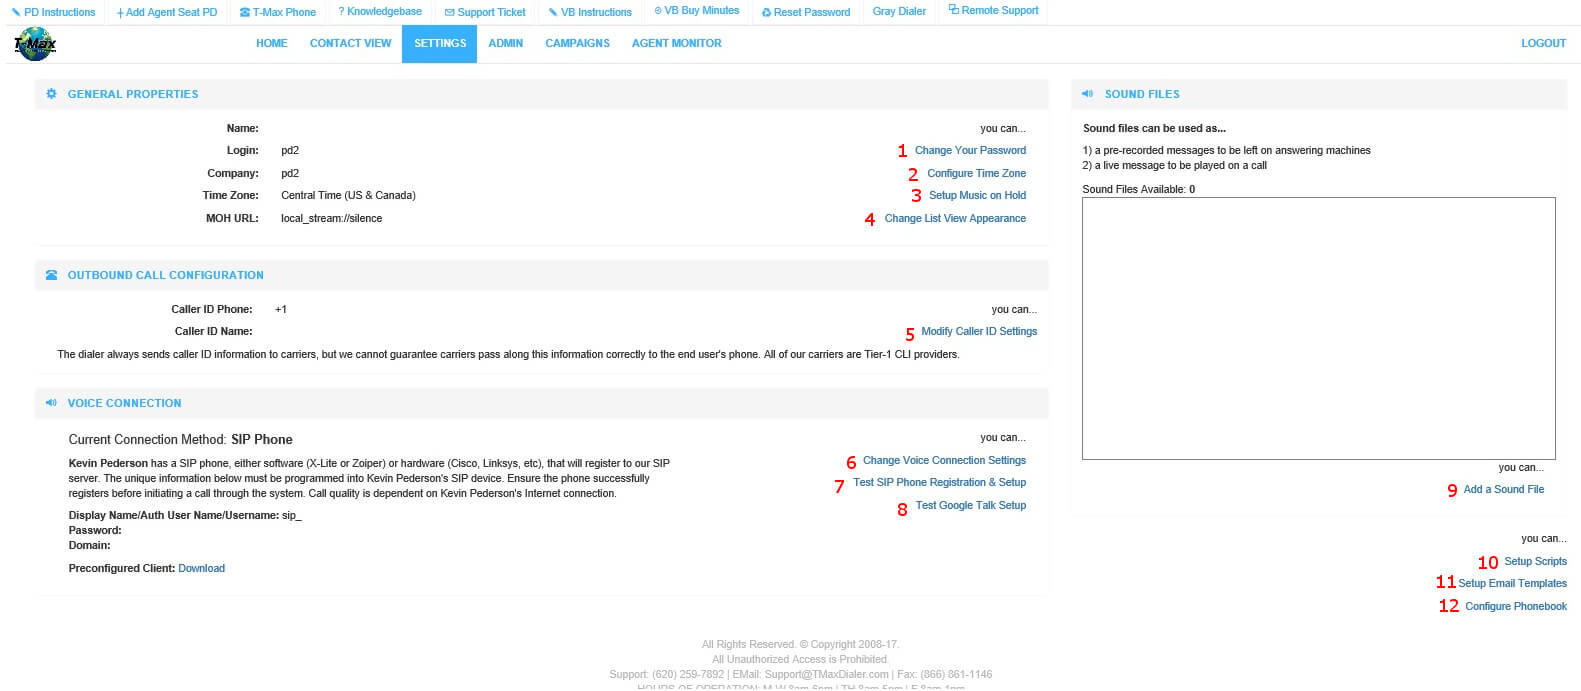
These settings are for Each Individual Agent and must be set or changed on each agents login.
- 1) This is where you can change your password for your login.
- 2) This is where you can set your dialer to your Time Zone.
- 3) Choose the music you listen to while on dialer.
- 4) Change the order your informaiton pops up to you on contact view tab.
- 5) This is the Name and Phone number that shows up on the caller ID of the person called when you make a outbound manual call.
- 6) This is where you can change the connection setting to sip phone, astrisks string or google talk.
- 7) After you set your connection you can test it.
- 8) If you want to set up Google talk you can configure here.
- 9) This is the place to add a premade message to play for VoiceMails and Answering Machines.
- 10) You can set the pop up script for the agent Here.
- 11) You can make a premade email template for your agent to send. You can merge the contact info with a letter you create.
- 12) Adding an entry into the phonebook allows agents to quickly transfer or 3-way conference commonly used numbers using a single click during a call. Phonebook entries can be added for either a standard telephone number (PSTN) or to a VoIP Address (SIP Address) using the add entry button above. SIP Addresses should be entered into the format @: (ex. 106@ast.myco.com:5060). Phonebooks are unique PER user. Clicking the EYE icon will toggle the entries visibility in the Contact View menu.
