Text to Speech Configuration.
Choose the campaign you want to use Text to Speech on and click on the Speaker icon.
Now we need to record the messages you will need to set up. Click the Add a Sound File button and follow the steps below. If you already have the messages you need, you can skip ahead to the Setting the Messages section 
On this screen, label your messages how you are going to set them, to make the process more simple. "Message 1, Message 2, Voicemail Message, and Broadcast Message" There are example photos below for reference.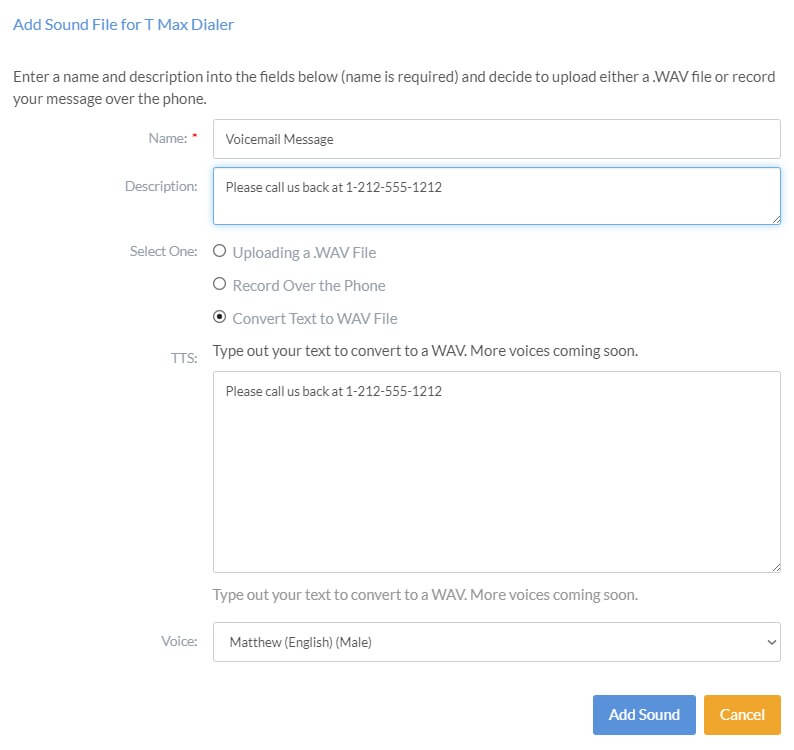
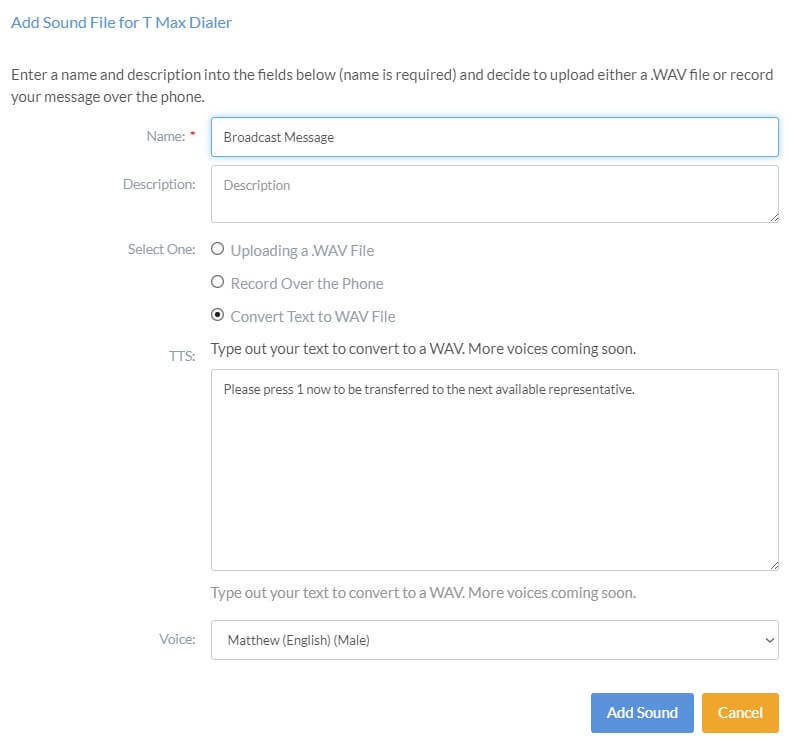
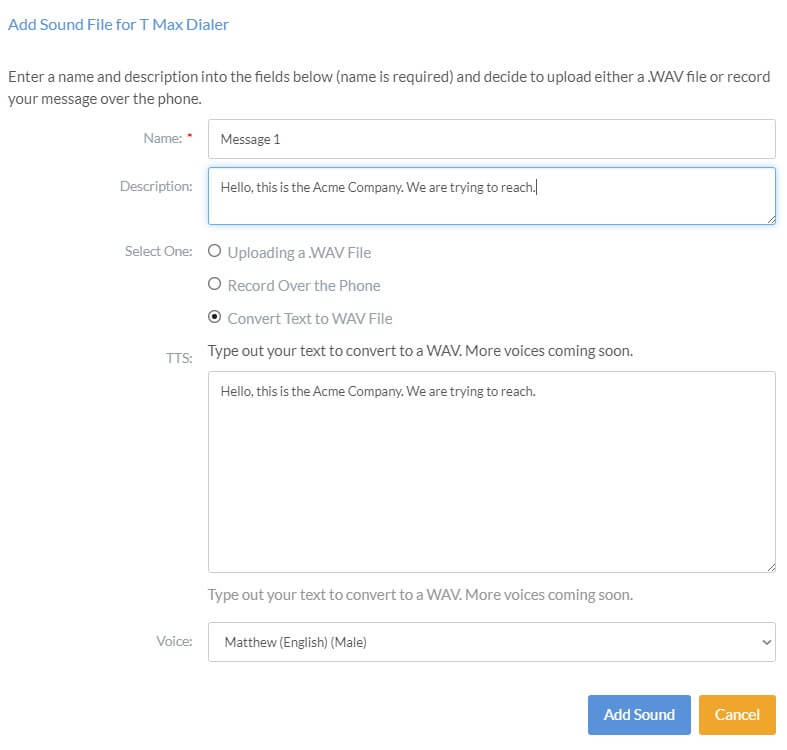
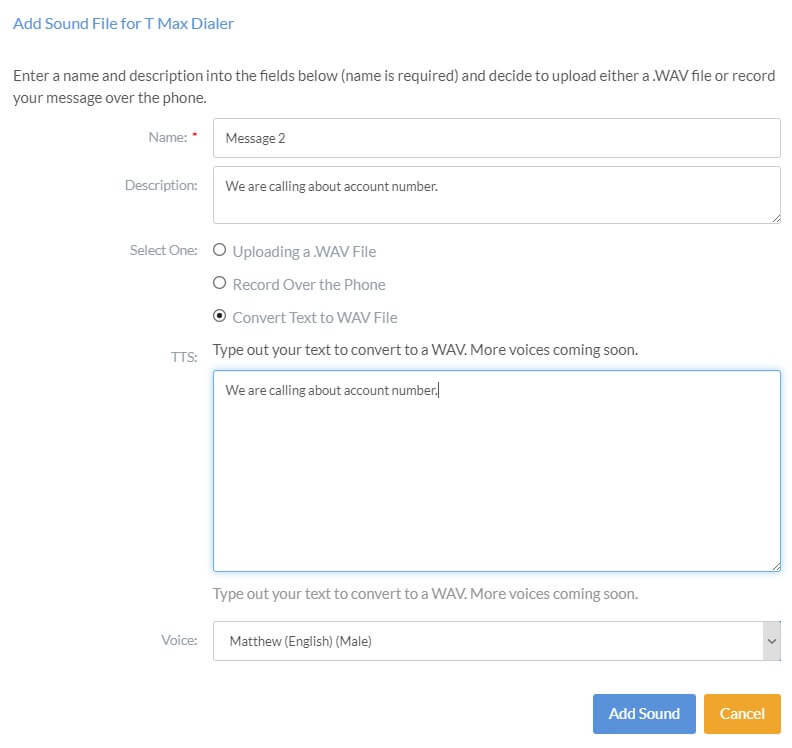
To make the Text to Speech feature flows better, make sure you select the voice that you have set as the default, under the Voice Settings screen, on the main Voice Broadcast. Click the Voice Settings button and choose the voice you want. That way the messages you recorded using Text to Speech is the same voice it's using to read the database fields from your file upload.![]()

Setting the Messages
Now, Set your Optional Mesg 1. For Example, "Hello, This is the Acme company and we are trying to reach"
Now, Set your Optional Mesg 2. For Example, "We are calling about account number"
Now, Set your main Broadcast message. This would be the ending of the message. For Example, "Please press 1 now to be transferred to a representative"
Now, Set your Voicemail message. This would be the message to leave a Phone number to call back. For Example, "Please call us back at 212-555-1212, thank you"
After you have your messages set, press Copy Sound Files.

Now, you should be back on the main Campaign screen, click on the Pencil Icon now on the desired campaign.
On the main edit window, click on your Options tab.
Now on this screen, click on the checkbox for Text to Speech Options and then hit the Edit button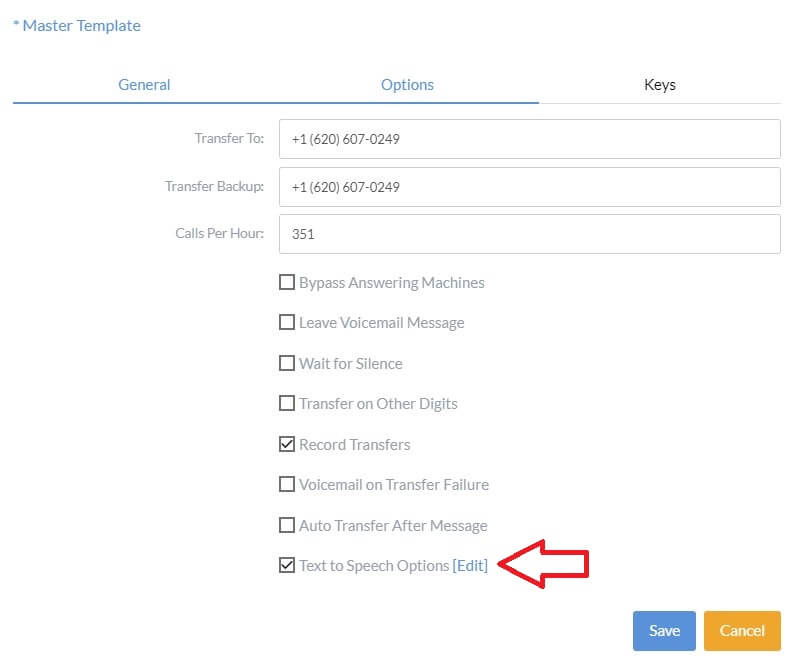
Now we're going to set up the message on how you want them to play. You can choose Load Settings From: and choose a previous campaign. If you don't have a previous campaign, simply double click the fields or drag and drop them where you want them. For example, you would start with
"Play Audio: Opt Mesg 1". Now choose
"Say:Client Name" field below the Opt Mesg 1. Now you would choose
"Play Audio: Opt Mesg 2" below the "Say: Full Name". Now choose the field
"Spell: Client ID" under the "Opt Mesg 2" field. to finish the message off, choose the
"Play Audio:Broadcast" field under the "Spell: Id/Account" field.
Now that Broadcast message script is complete, click the Save button so you don't lose any changes. Now, click the Edit button under "Text to Speech Options" button again, because we need to repeat the above steps to setup the Voicemail message portion. The only difference will be, you will choose the "Play Audio: Voicemail" for the last part of the script, Broadcast Message and Voicemail examples are pictured below.

Now simply hit the Save Button again on the main campaign edit window and that's it.
Now that everything is configured and based on how the examples were configured above, your new Text to Speech Broadcast message will say.
Hello, This is the Acme company and we are trying to reach "Bob Smith" We are calling about account number "12345" Please press 1 now to be transferred to a representative.
The Voicemail message would say
Hello, This is the Acme company and we are trying to reach "Bob Smith" We are calling about account number "12345" Please call us back at 1-212-555-1212.
Always make sure to do a Test call to yourself, to make sure it's working like it should. Enter the phone number you want it to call, and enter information you have specified in the Text to Speech script. There's an example below on how the test call information should look.
When doing the test call, answer one of the calls and say Hello, and let one go to Voicemail.
That's it, you have configured your first Text to Speech campaign. If you have additional questions, please don't hesitate to call our office.

